


Setting Up Email Accounts in Outlook 2010 / 2013
1) Open Microsoft Outlook 2010 / 2013
2) At the top of the screen where it says File, Home, Send/Receive etc, click on File then click on Info on the left hand side.
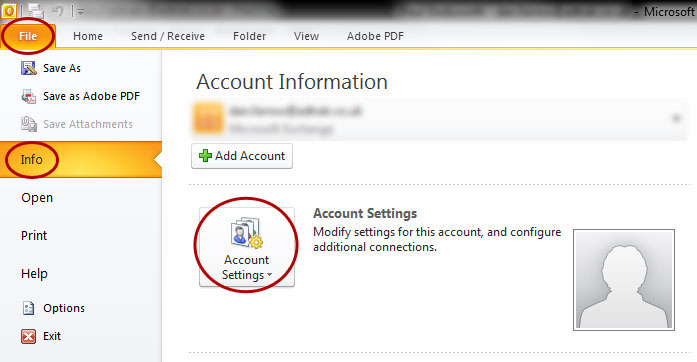
3) Click Account Settings button and then click Account Settings from the drop down. The box below will appear.
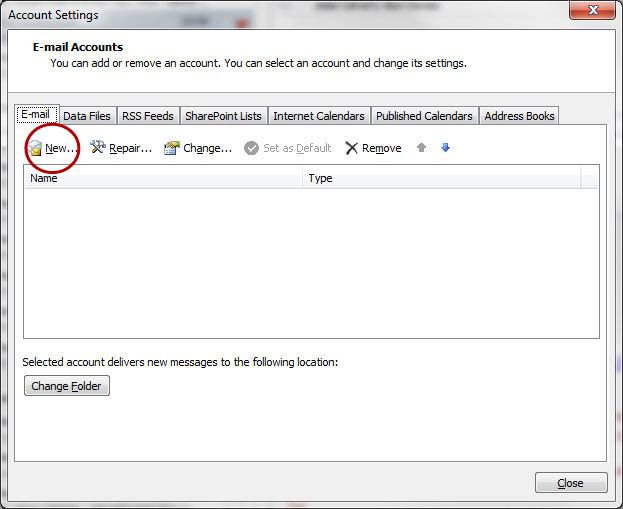
4) Click New...
5) Choose E-mail Account and click next
6) Click Manually configure server settings or additional server types and click next
7) Choose POP or IMAP / Internet E-mail and click next
User Information
- Your Name - this is what people will see when you email them, e.g. John Smith
- E-mail Address - e.g. info@yourdomain.com
Server Information
- Account Type - select IMAP from the drop down
- Incoming mail server - your web designer will provide you with this
- Outgoing mail server (SMTP) - your web designer will provide you with this
Logon Information
- User Name - your email address e.g. info@yourdomain.com
- Password - the password we will have supplied to you (this is case-sensitive)
NB: Please make sure to fill in all fields correctly
8) Click More Settings...
9) Click the tab that says Outgoing Server
10) Select My outgoing server (SMTP) requires authentication.
11) Ensure Use same settings as my incoming mail server is checked
12) Click OK
13) Click Test Account Settings - if the information you have entered is correct, this will bring back a "successful" message
14) Click Next, and then Finish
15) Your account should be fully functional. Press Send / Receive, and if it is working, no error messages will be thrown up.
If you are still having problems, give us a ring on 0800 197 2336
Setting Up Email Accounts in Outlook 2007
1) Open Microsoft Outlook 2007
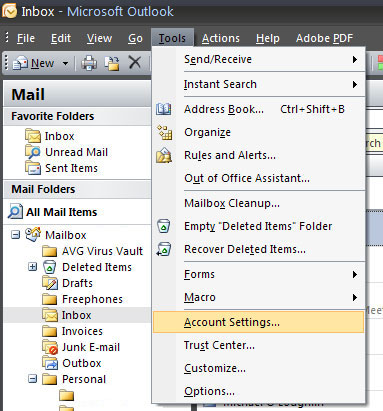
2) At the top of the screen where it says File, Edit etc, click on Tools then click on Account Settings
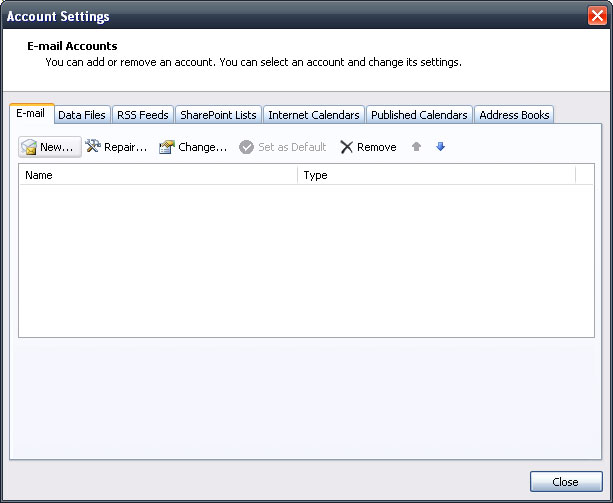
3) On the Account Settings window under the E-mail tab, click New...
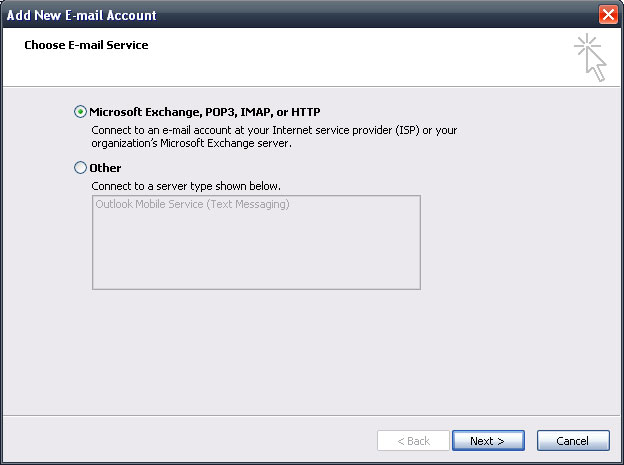
4) On the Add New E-mail Account window, select Microsoft Exchange, POP3, IMAP or HTTP and click Next
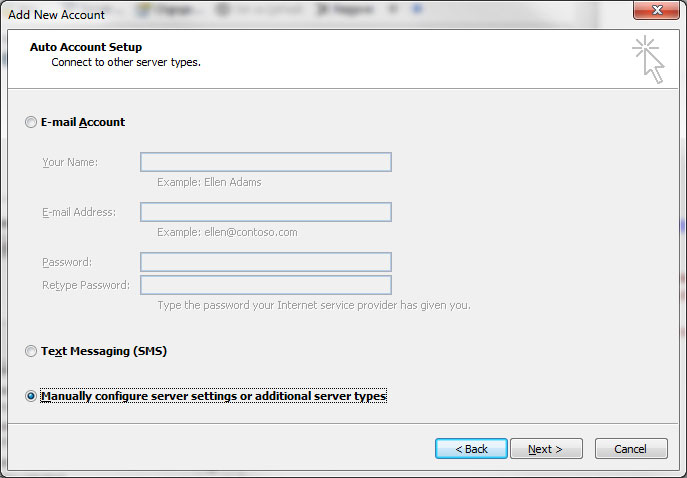
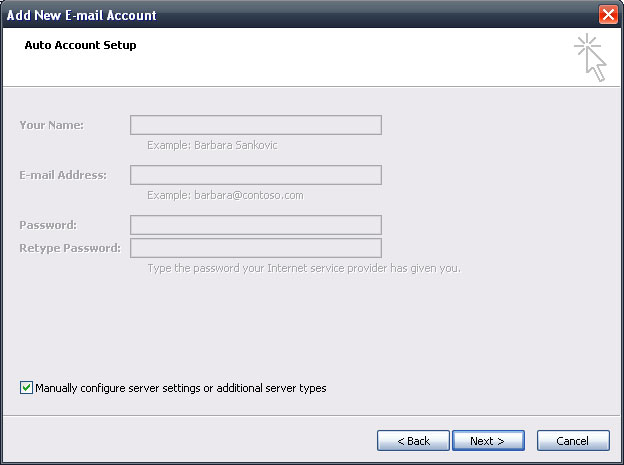
5) On the Auto Account Setup, click the box at the bottom that says Manually configure server settings or additional server types and click Next
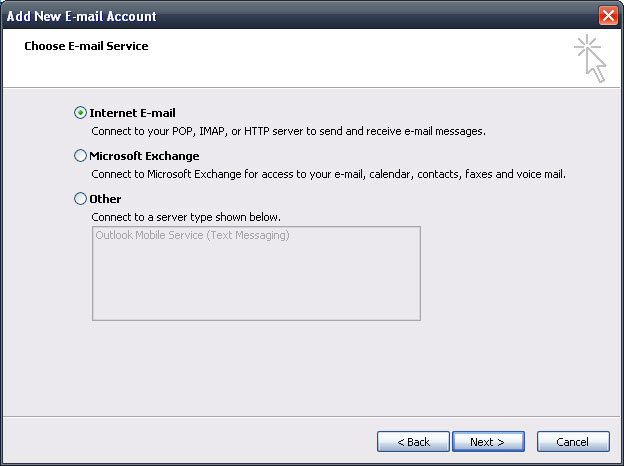
6) On the next window, click Internet E-mail and click Next
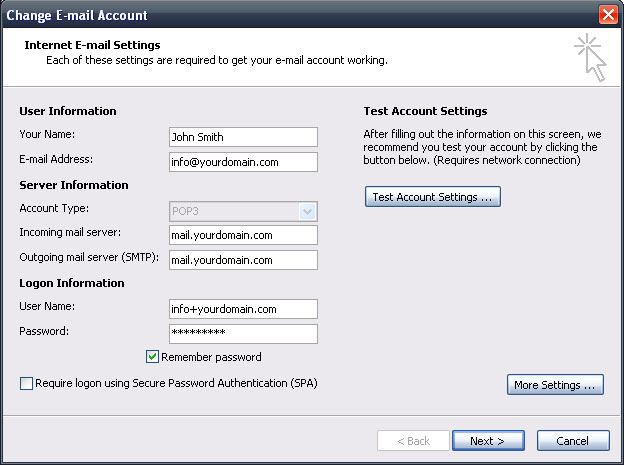
7) On the Internet E-Mail Settings window, fill in your information.
User Information
- Your Name - this is what people will see when you email them, e.g. John Smith
- E-mail Address - e.g. info@yourdomain.com
Server Information
- Account Type - select IMAP from the drop down
- Incoming mail server - your web designer will provide you with this
- Outgoing mail server (SMTP) - your web designer will provide you with this
Logon Information
- User Name - your email address e.g. info+yourdomain.com
- Password - the password we will have supplied to you (this is case-sensitive)
NB: Please make sure to fill in all fields correctly
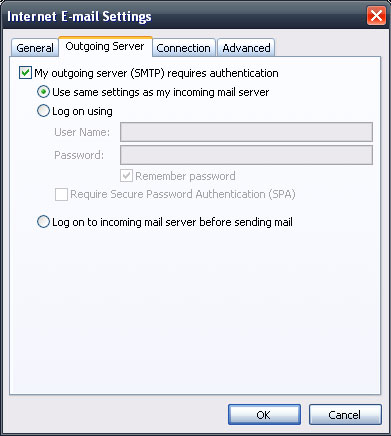
8) Click More Settings...
9) Click the tab that says Outgoing Server
10) Select My outgoing server (SMTP) requires authentication.
11) Ensure Use same settings as my incoming mail server is checked
12) Click Test Account Settings - if the information you have entered is correct, this will bring back a "successful" message
13) Click Next, and then Finish
14) Your account should be fully functional. Press Send / Receive, and if it is working, no error messages will be thrown up.
If you are still having problems, give us a ring on 0800 197 2336
Setting Up Email Accounts in Outlook 2003
1) Open Microsoft Outlook 2003
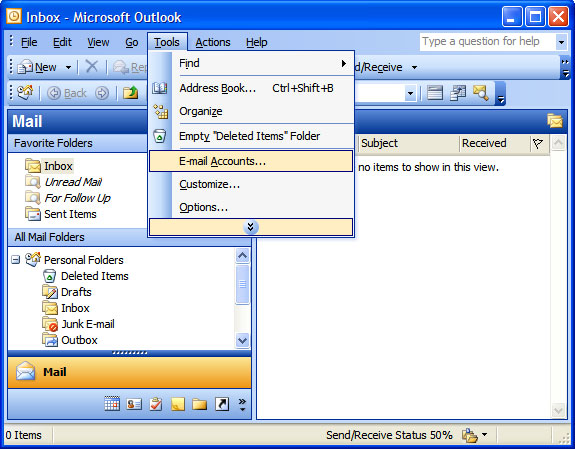
2) At the top of the screen where it says File, Edit etc, click on Tools then click on Email Accounts
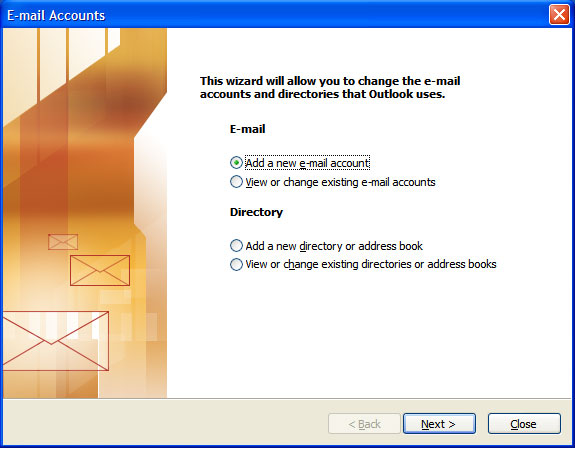
3) On the E-mail Accounts wizard window, select Add a new e-mail account, and then click Next.
4) For your server type, select IMAP, and then click Next.
5) On the Internet E-mail Settings (IMAP) window, enter your information as follows:
User Information
- Your Name - this is what people will see when you email them, e.g. John Smith
- E-mail Address - e.g. info@yourdomain.com
Logon Information
- User Name - your email address e.g. info+yourdomain.com
- Password - the password we will have supplied to you (this is case-sensitive)
Server Information
- Incoming mail server (POP3) - your web designer will provide you with this
- Outgoing mail server (SMTP) - your web designer will provide you with this
* Please note, some hosts need you to use their servers. If using our Outgoing mail server does not work, contact us for more help
6) Click More Settings...
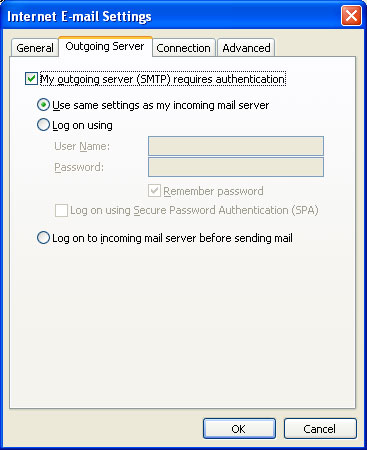
7) Click the tab that says Outgoing Server
8) Select My outgoing server (SMTP) requires authentication.
9) Ensure Use same settings as my incoming mail server is checked
10) Click Test Account Settings - if the information you have entered is correct, this will bring back a "successful" message
11) Click Next, and then Finish
12) Your account should be fully functional. Press Send / Receive, and if it is working, no error messages will be thrown up.
If you are still having problems, give us a ring on 0800 197 2336
Setting Up Email Accounts in Outlook Express
1) Open Microsoft Outlook Express
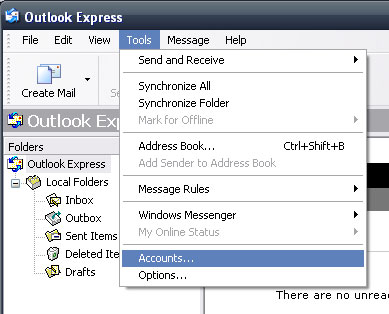
2) At the top of the screen where it says File, Edit etc, click on Tools then click on Accounts...
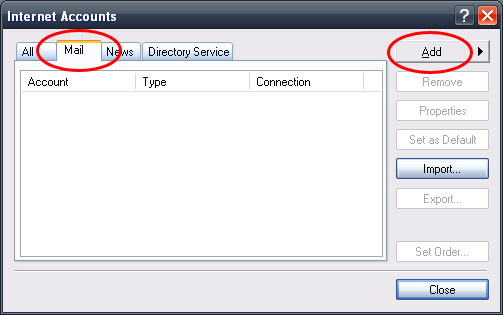
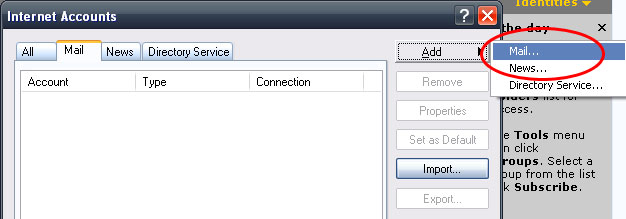
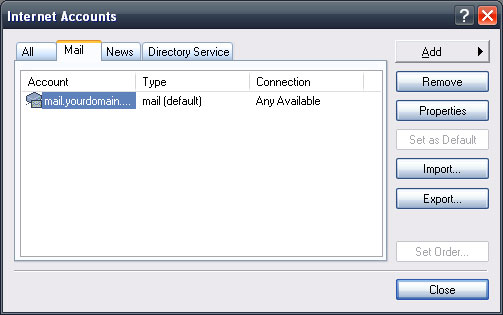
3) On the Internet Accounts wizard window, click on the Mail tab, then click on Add
Click Mail...
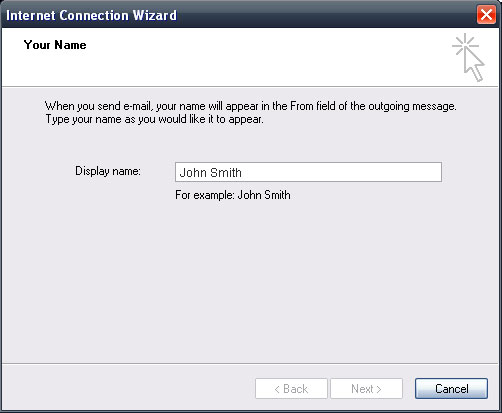
4) On the next screen, put your name is as you would it to appear on all your Outgoing Emails (e.g. John Smith)
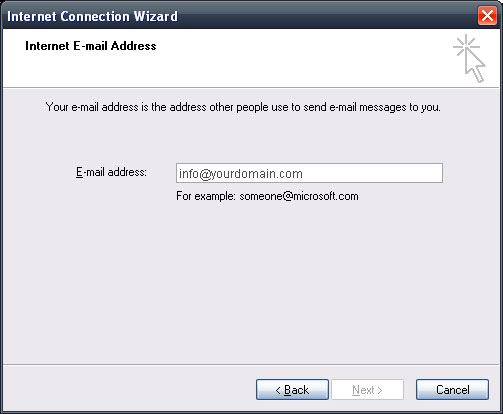
5) On the Internet E-Mail Address screen, put in your email address (e.g. info@yourdomain.com)
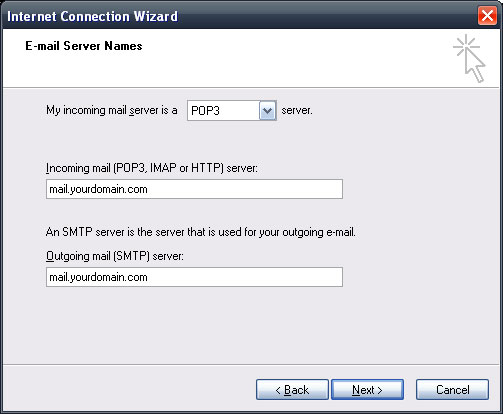
6) On the E-Mail Server Names, click on IMAP. Incoming & Outgoing mail server details will be provided to you by your web designer.
7) On the next screen, put in your User Name and Password.
Your User Name is your email address
We will have provided you with your password to your email account.
Once you have put these in, click Next
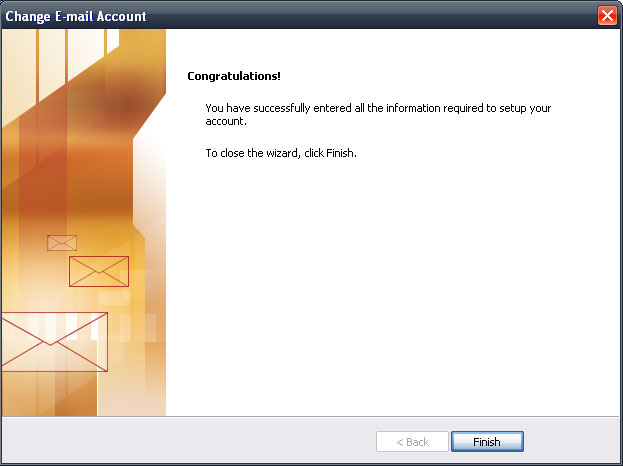
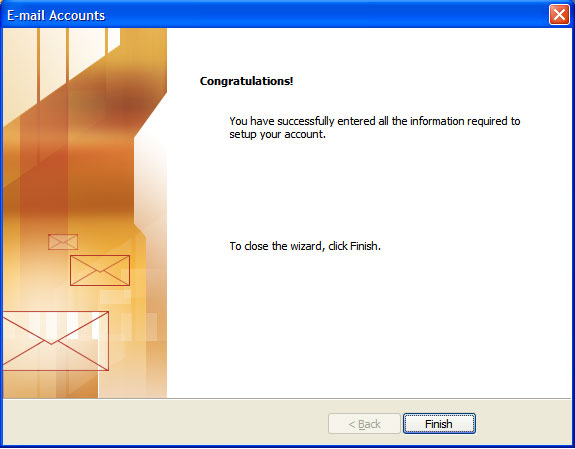
8) You will be presented with this congratulations screen - click Finish.
9) Once you have done this, you will be brought back to the below screen, with your new email address now in.
10) Double click your email account in this window, and the below will appear. Click on the Servers tab

11) On the Servers tab, at the bottom, click My server requires authentication
12) Click Apply, then click OK to return to the Internet Accounts window, and then click Close. Your emails are now set up.
If you are still having problems, give us a ring on 0800 197 2336
Setting Up Email Accounts in Mozilla Thunderbird
1) Open Mozilla Thunderbird
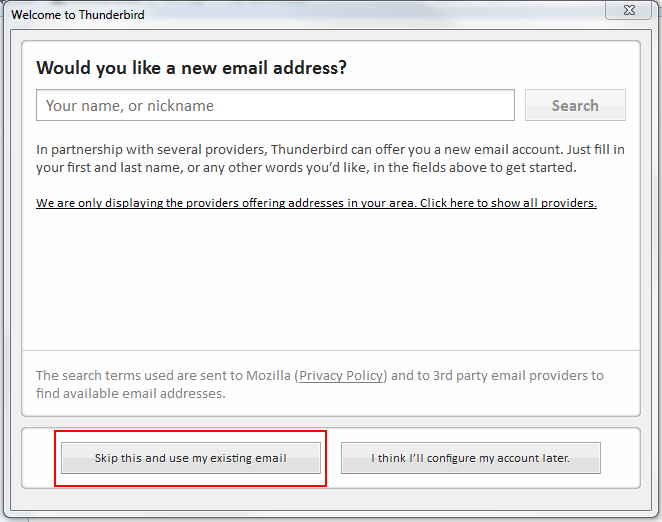
2) You will be prompted with a 'Welcome to Thunderbird' screen, from here click on 'Skip this and use my existing email'.
3) The next step will ask for your name, email address and password, these will have been provided to you over email, if they haven't please get in touch with us.
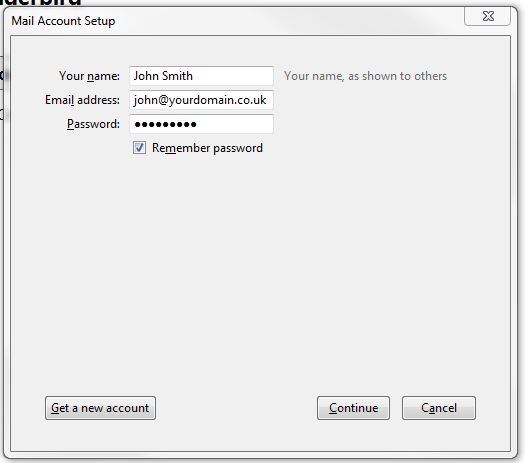
Enter this information then click continue
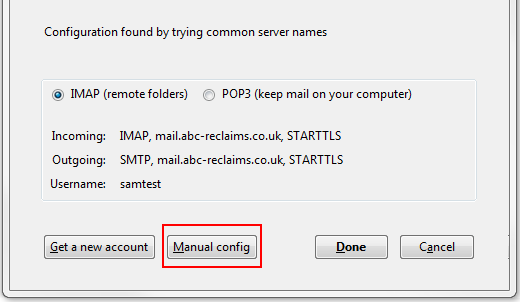
4) Now you will need to select the 'manual config' option at the bottom of the window.
5) From here you will need to fill out the settings you received over Email and click done, server host name and ports will need to be provided by your web designer.
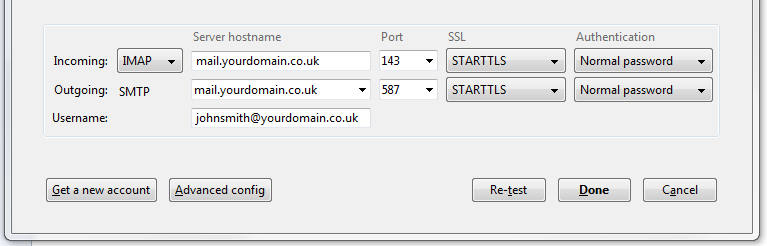
User Information
- Your Name - this is what people will see when you email them, e.g. John Smith
- E-mail Address - e.g. info@yourdomain.com
Server Information
- Account Type - select IMAP from the drop down
- Incoming mail server - server host name and ports will need to be provided by your web designer.
- Outgoing mail server (SMTP) - server host name and ports will need to be provided by your web designer.
Logon Information
- User Name - your email address, but with a + sign instead of the @ symbol, e.g. info+yourdomain.com
- Password - the password we will have supplied to you (this is case-sensitive)
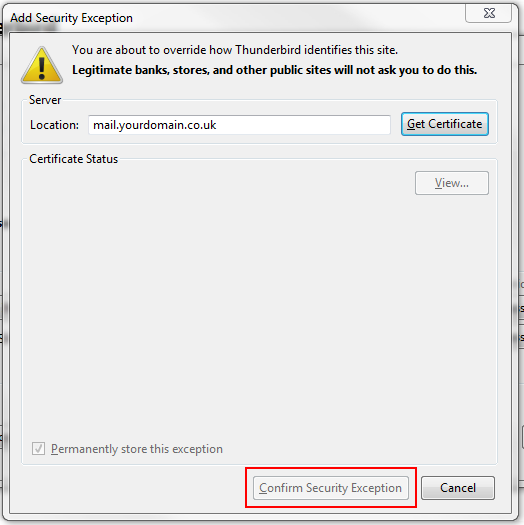
6) You will receive a prompt to confirm adding a security exception, go ahead and click 'Confirm Security Exception' at the bottom of the window.
7) Your account should be fully functional. Press Get Mail, and if it is working, no error messages will be thrown up.
If you are still having problems, give us a ring on 0800 197 2336
Accessing Emails Online Using Webmail
1) Open your internet browser.


2) Go to your domain, followed by /webmail (e.g. www.yourdomain.com/webmail)
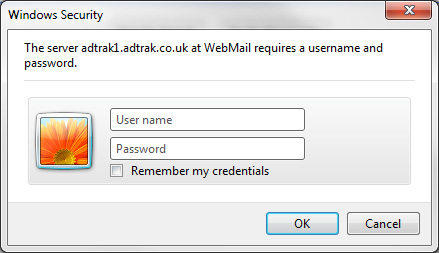
3) This will bring up a login box asking for a User Name and Password.
Your User Name is your email address (e.g. info@yourdomain.com).
We will have provided you with your password in an email.
Put your User Name & Password into the box and click OK.
4) You will be presented with a screen with 3 options. From here, you can change your password, forward your emails and other options.
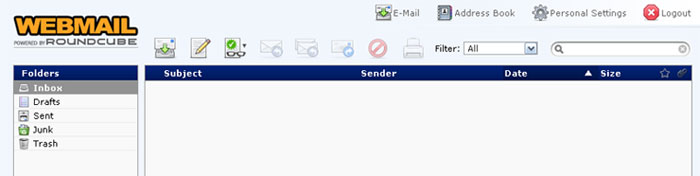
To read your email, click Read Mail Using RoundCube
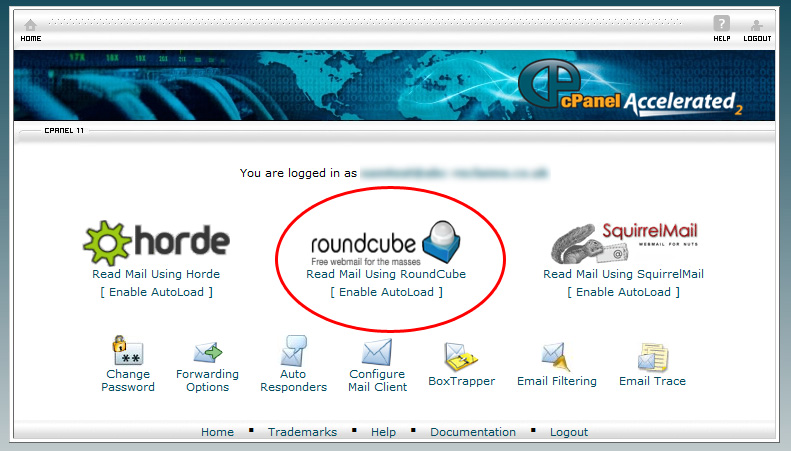
5) This will log you into your inbox. From here, you can read all your emails, and create new ones/delete etc.
If you are still having problems, give us a ring on 0800 197 2336
Setting Up Email Accounts on an iPad
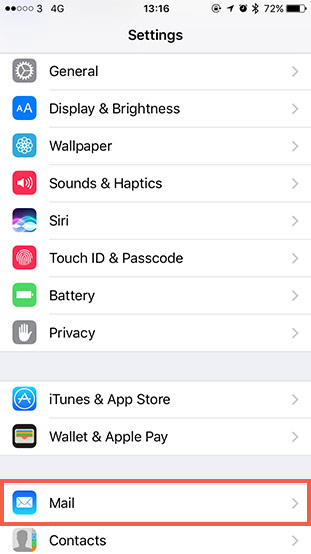
1) Open Settings
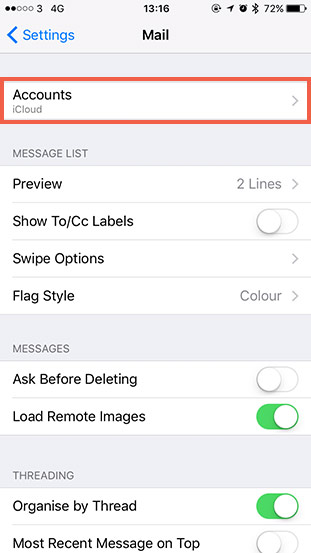
2) Touch Mail, Contacts, Calendars
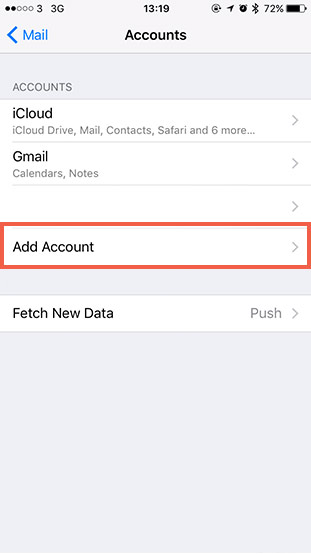
3) Touch Accounts...
4) Touch Add Account
5) Touch Other
6) Touch Add Mail Account
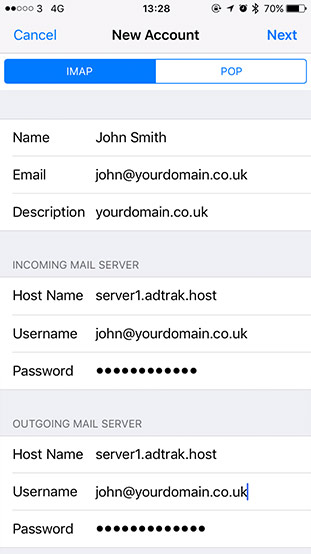
7) Enter your details;
Name: the display name
Email: your email address
Password: the password we have supplied to you
Description: this will auto fill in
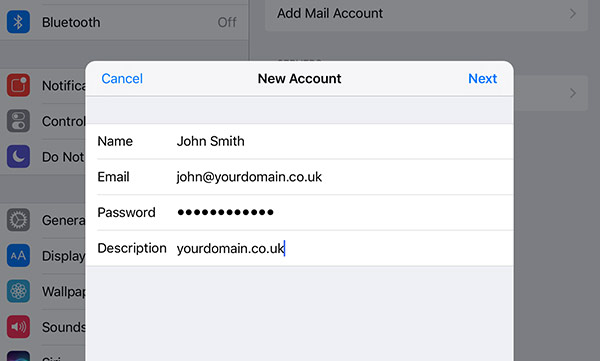
8) Click Next
9) Ensure you're on the IMAP tab
Enter further details that we have provided to you such as host name
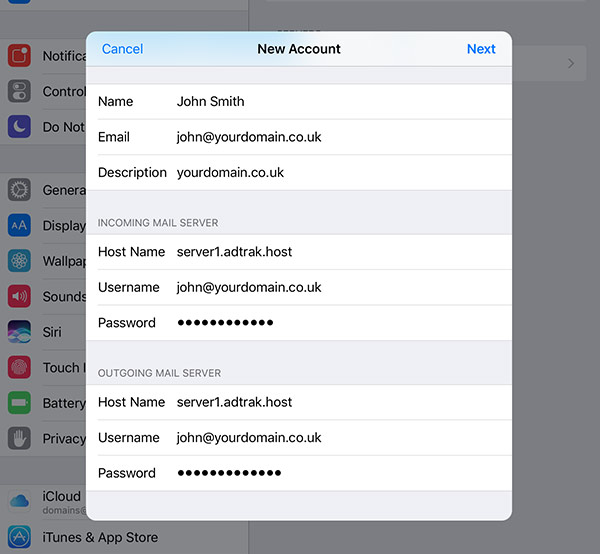
10) Click Save.
A box may appear saying "Cannot verify server identity" - click "Continue"
This box may appear twice. Click continue.
11) Your emails are now set up. Please exit the Settings app, and touch the Mail app.
Your new inbox will be listed here.
If you are still having problems, give us a ring on 0800 197 2336
Accessing Emails Through an Apple iPhone
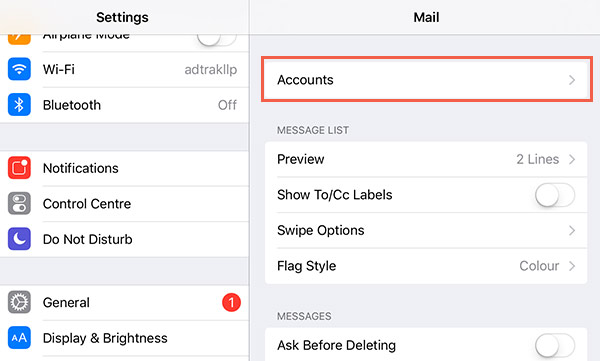
- Open Settings app.
- Select Mail (this is usually around the 20th one down).
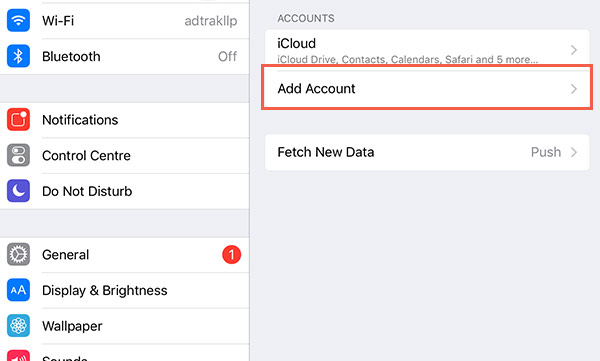
- Select Accounts.
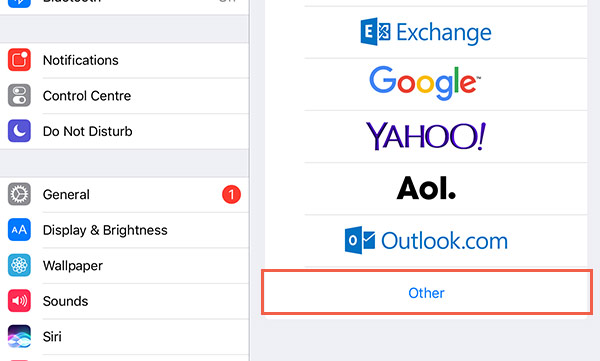
- Select Add Account.
- Select Other.
- Select Add Mail Account.
- Enter your name, e-mail address, password (that Adtrak have supplied for you) and give the account a description and click Next.
- Now ensure that the IMAP tab is selected
- Enter further details that we have provided to you such as host name. Your username is your email address.
- Click Save.
- You will be prompted will a message secure connection failed, select CONTINUE on this message.
- You may receive a second message saying: secure connection failed, select CONTINUE on this message.
- The iPhone will set the account up and then return you to the accounts settings.
- Select your account, scroll to the bottom and select advanced.
- You can now set if you would like mail to be removed from the iPhone at certain stages.
- Use SSL should be switched ON.
- You can now close the settings app if your account is listed and should be setup and ready to use.
- Now open your mail app. You will now have your email accounted listed. Select this and then select your inbox. Your mail will now be displayed in here.

If you are still having problems, give us a ring on 0800 197 2336
Setting Up Windows 10 Mail
Launch your Email App
- Press the WINDOWS key on your keyboard to access the Windows 10 Start menu
- Select Mail
Add an email account
- Click the Settings icon
- Click Accounts
- Click Add Account
- Under Choose an account, click Advanced setup at the bottom of the list
- Click Internet email
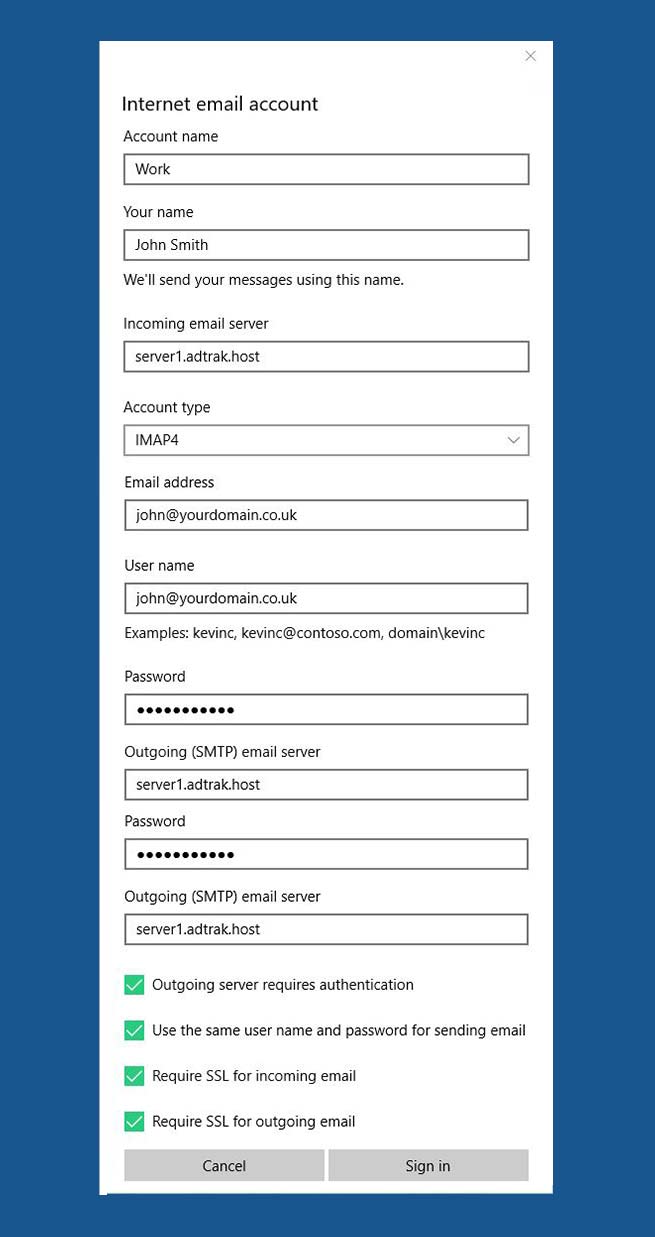
Enter Internet email account settings
- Incoming email server: ask web designer
- Account type: IMAP4
- Email address: your email address
- User name: your email address
- Password: the password we have supplied to you
- Outgoing (SMTP) mail server: ask web designer
- Ensure all 4 of the below boxes are ticked (relating to authentication, SSL etc)
- Click Sign-in
Your account should be fully functional. Click the Get Mail icon, and if it is working, no error messages will be thrown up.
If you are still having problems, give us a ring on 0800 197 2336
Setting Up Email Accounts in Mac Mail
1) Open Mac Mail
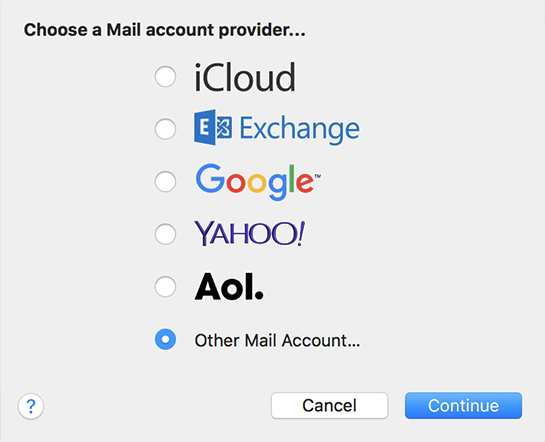
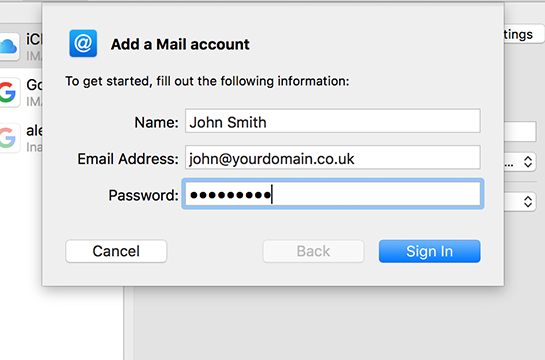
2) You will be prompted with a 'Welcome to Mail' screen you'll need to select Other Mail Account... and click continue
3) Next you will need to fill out your Name,Email address and Password which would have been provided to you at the time of setup
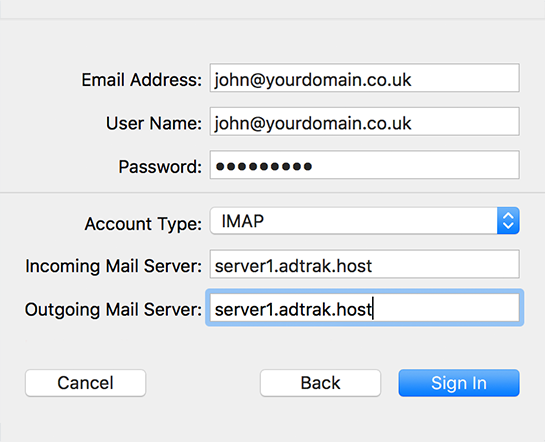
4) On the next screen you will be able to fill out your Email address, User Name (which is your email address) and password which would have been provided to you at the time of setup
Enter this information then click continue
4) If you see a security warning, please click connect
5) Next you will need to fill out your Incoming & Outgoind Mail Settings, these details can be provided to you by your web designer.
If you are having any problems at all, double check the details match with the information below:
User Information
- Your Name - this is what people will see when you email them, e.g. John Smith
- E-mail Address - e.g. info@yourdomain.com
Server Information
- Account Type - select IMAP from the drop down
- Incoming mail server - please contact your web designer for this information
- Outgoing mail server (SMTP) - please contact your web designer for this information
Logon Information
- User Name - your email address
- Password - the password we will have supplied to you (this is case-sensitive)
6) You may receive a prompt about outgoing security, just make sure 'Use Secure Socket Layer (SSL) is ticked and click continue. Any port numbers can be provided by your web designer.
7) Finally, double check your details are correct in the 'Account Summary' and that 'Take Account Online' is clicked and click 'create'
8) Your account should be fully functional. Click the Get Mail icon, and if it is working, no error messages will be thrown up.
If you are still having problems, give us a ring on 0800 197 2336
Setting Up Email Accounts on Android Phones & Tablets
1) Open Email app
Note: If no email account has been setup previously it will ask you to add an account by default - skip to step 5. If adding a second account please follow the below:
2) Press the Option Button
3) Select Settings
4) Select Add Account
5) Enter your, e-mail address, password (that Adtrak have supplied for you) and click Next
6) Now select Manual Setup
7) Choose IMAP Account
8) Enter the incoming mail server details:
User Name: enter your email address: EMAIL@YOURDOMAIN.com
Password: Adtrak have supplied this to you
IMAP Server: contact your web designer
Security Type: SSL
Port: contact your web designer
9) Click Next
10) Enter the outgoing mail server details:
SMTP: Contact your web designer
Security Type: Auto if available / SSL
Port: Contact your web designer
User Name: enter your email address: EMAIL@YOURDOMAIN.com
Password: Adtrak have supplied this to you.
11) Click Save
12) Tick relevant options regarding how often to sync & notifications then click Next
13) Your email account should now be connected & your mail will now be displayed when opening the mail app.
If you are still having problems, give us a ring on 0800 197 2336
Frequently Asked Questions / Troubleshooting
Although Adtrak strive to help your with your emails, we can not always supply complete support for setting them up. If your emails are working on our server, but not on your computer, there is only so much Adtrak will be able to do. If you need specific help setting up emails on your machine, please contact an IT Support company who will be able to assist you.
- Are Adtrak hosting your emails?
- Are you using an Exchange Server?
- Is your internal network functioning correctly?
- Are the emails on your server definitely working?
- Do you have an Anti-Virus program installed on your machine?
- Is your firewall enabled?
- Have you spelled everything correctly?
- Have you followed the guides correctly?
- Why do you get a log in box with your new emails working when you press Send/Receive?
- Your emails have worked before and now they have stopped working. Why?
- Does your router need a restart or does it have a firewall?
- You have a single email account set up on multiple machines or multiple users are trying to access the same email account, but you're not receiving all the email?
- Your emails seem to be working and not throwing up errors, but you can't find them?
- I have tried all the above; what else can I do?
Q1: Are Adtrak hosting your emails?
A: Although Adtrak may host your website, it is not always the case that we host your emails too. Please ensure that Adtrak are hosting your emails.
Q2: Are you using an Exchange Server?
A: Many companies use an in-house Exchange Server for their emails. We do not supply any support for Exchange Servers. If you are unsure if you have an Exchange Server, please contact your IT Manager/Support Service. If you don't have an IT Manager/Support service, it is most likely that you do not have an Exchange server.
Q3: Is your internal network and internet functioning correctly?
A: Often, an internal network within an office may not be set up correctly, or might need some attention. Please ensure this is functioning correctly. You may also need to ensure that your internet is properly connected - please visit www.adtrak.co.uk and press Ctrl + F5. If the Adtrak site displays correctly then your internet is working properly.
Q4: Are the emails on your server definitely working?
A: In order to be sure that the emails are working on our server, you can send a test email to your email address (from another email address) and log in to your webmail through your internet browser. Please see here on how to do this. Once you have logged in, the test email you sent should be sitting in there. If the test email is not in there (allow at least 10 minutes for the email to come through) then please contact us on 0115 959 8900.
Q5: Do you have an Anti-Virus program installed on your machine?
A: Many anti-virus programs tend to block incoming email. Please try disabling your email scanner/checker in your Anti-Virus, or disabling your Anti-Virus completely to see if your emails begin to work. If the emails still fail to work, please ensure you turn your Anti-Virus back on.
A: If yes, please ensure that your Email Application (e.g. Outlook 2003, Outlook Express) is not blocked, and is allowed access. If your Email Application is blocked, please enable access. If your Email Application is allowed access and your emails are still not working, please try the other FAQs.
Q7: Have you spelled everything correctly?
A: Please ensure that you have spelled everything correctly. Your password we supply to you will be case sensitive, so capital letters will need to go in as capital letters. The best way to ensure you are inputting them correctly is to copy (Ctrl + C) them directly out of the email we sent you and pasting (Ctrl + V) them into the relevant input boxes.
Q8: Have you followed the guides correctly?
A: We have supplied a complete guide on how to set up emails in various programs, as well as accessing your emails from a web browser. Please see the full guide here.
Q9: Why do you get a log in box with your new emails working when you press Send/Receive?
A: You may still have an old email account set up on your machine. You will need to go back into your e-mail settings and remove this old one to fix this problem.
Q10: Your emails seem to be working and not throwing up errors, but you can't find them?
A: Please check your Junk Email folder to ensure that the emails have not been placed in there.
Q11: Your emails have worked before and now they have stopped working. Why?
A: Have you installed any new software on your machine, or changed anything on your PC at all that might affect your emails? These can be issues, and you will need to contact an IT Support service to help fix this. Although our server is up 99% of the time, there are times when it goes down. If your website does not appear when you go to it then give us a call to see if we are having server problems.
Q12: Does your router need a restart or does it have a firewall?
A: You may need to restart your router to get it to function properly. Your router may also have an in-built firewall which will need to be set up to allow emails using your Email Application.
Q13: You have a single account set up on multiple machines, but you're not receiving all the email?
A: When multiple users are accessing the same email account, only one person will receive an email at any one time, leaving the others without the emails. This is due to the fact that when one person clicks Send/Receive, they will download all the emails on the server and leave nothing left, so when another person clicks Send/Receive, there will be nothing left to download.
To fix this, go to your Email Accounts, double click on the email account that you are having problems with, click More Settings..., click the Advanced tab, then check Leave a copy of the message on the server. Then click Remove from server after and then set the days to 10. This will mean that your quota for your mailbox will not fill up too quickly.
! Important: this needs to be done on ALL machines that have access to the same email account, otherwise problems will still occur.
Q14: I have tried all the above; what else can I do?
A: If you have tried all of the above questions/suggestions, please contact Adtrak on 0115 959 8900. We may however not be able to help you, and you may need to get a specialist IT Support company in to set up your emails.